Vintage comic book look tutorial
This is something I have been wanting to do for some time.
First off course, do your drawing. I use this color palette: https://www.deviantart.com/j-skipper/art/Official-DC-Comics-375-Color-Palette-454936613
For this example I will use a drawing I made a few months ago. Remember the file needs to be big. Mine is 7038 x 10335 pixels and 625 dpi.

Now we are ready to get started. First you need to make your color layers (or folder like I have here) invisible so you only see your lineart.

Now go to select/ color range. Select all the white parts

Now go to channels and create a new channel from the selection. This will save it for later.

Click on that button
After you do that, deselect and go back to the layers panel. Now make the colors visible again and make the line art layer invisible

Now go back to select/color range and select the white parts

Notice that I changed the Fuzziness with this one
Now again go to the channels tab and create a new channel. Deselect after that

Now you have to selections saved
Next, delete your lineart. and all the white on your drawing (In my case is in a separate layer so I just delete that) and merge your color layers.
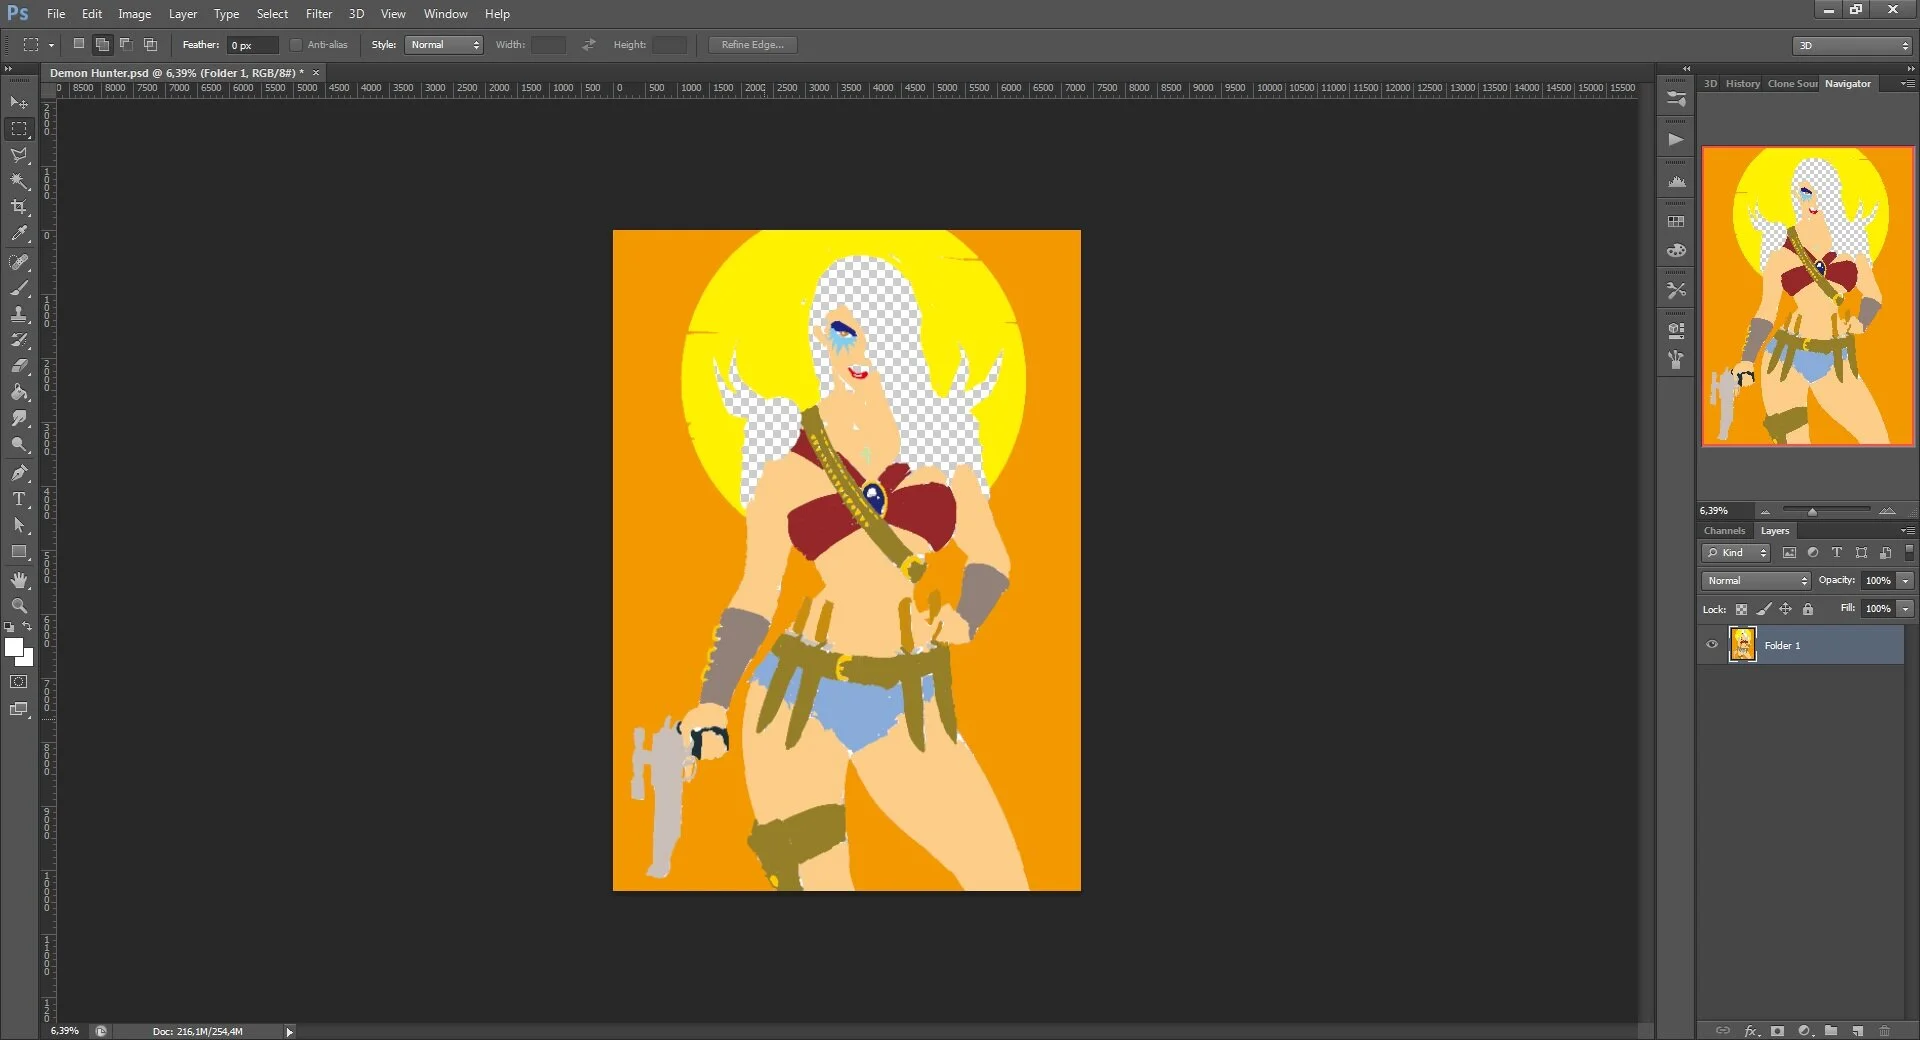
Now go to image / mode / CMYK color. After that make your color into a smart object. You can do this by right clicking over it.

Next set the layer to darken
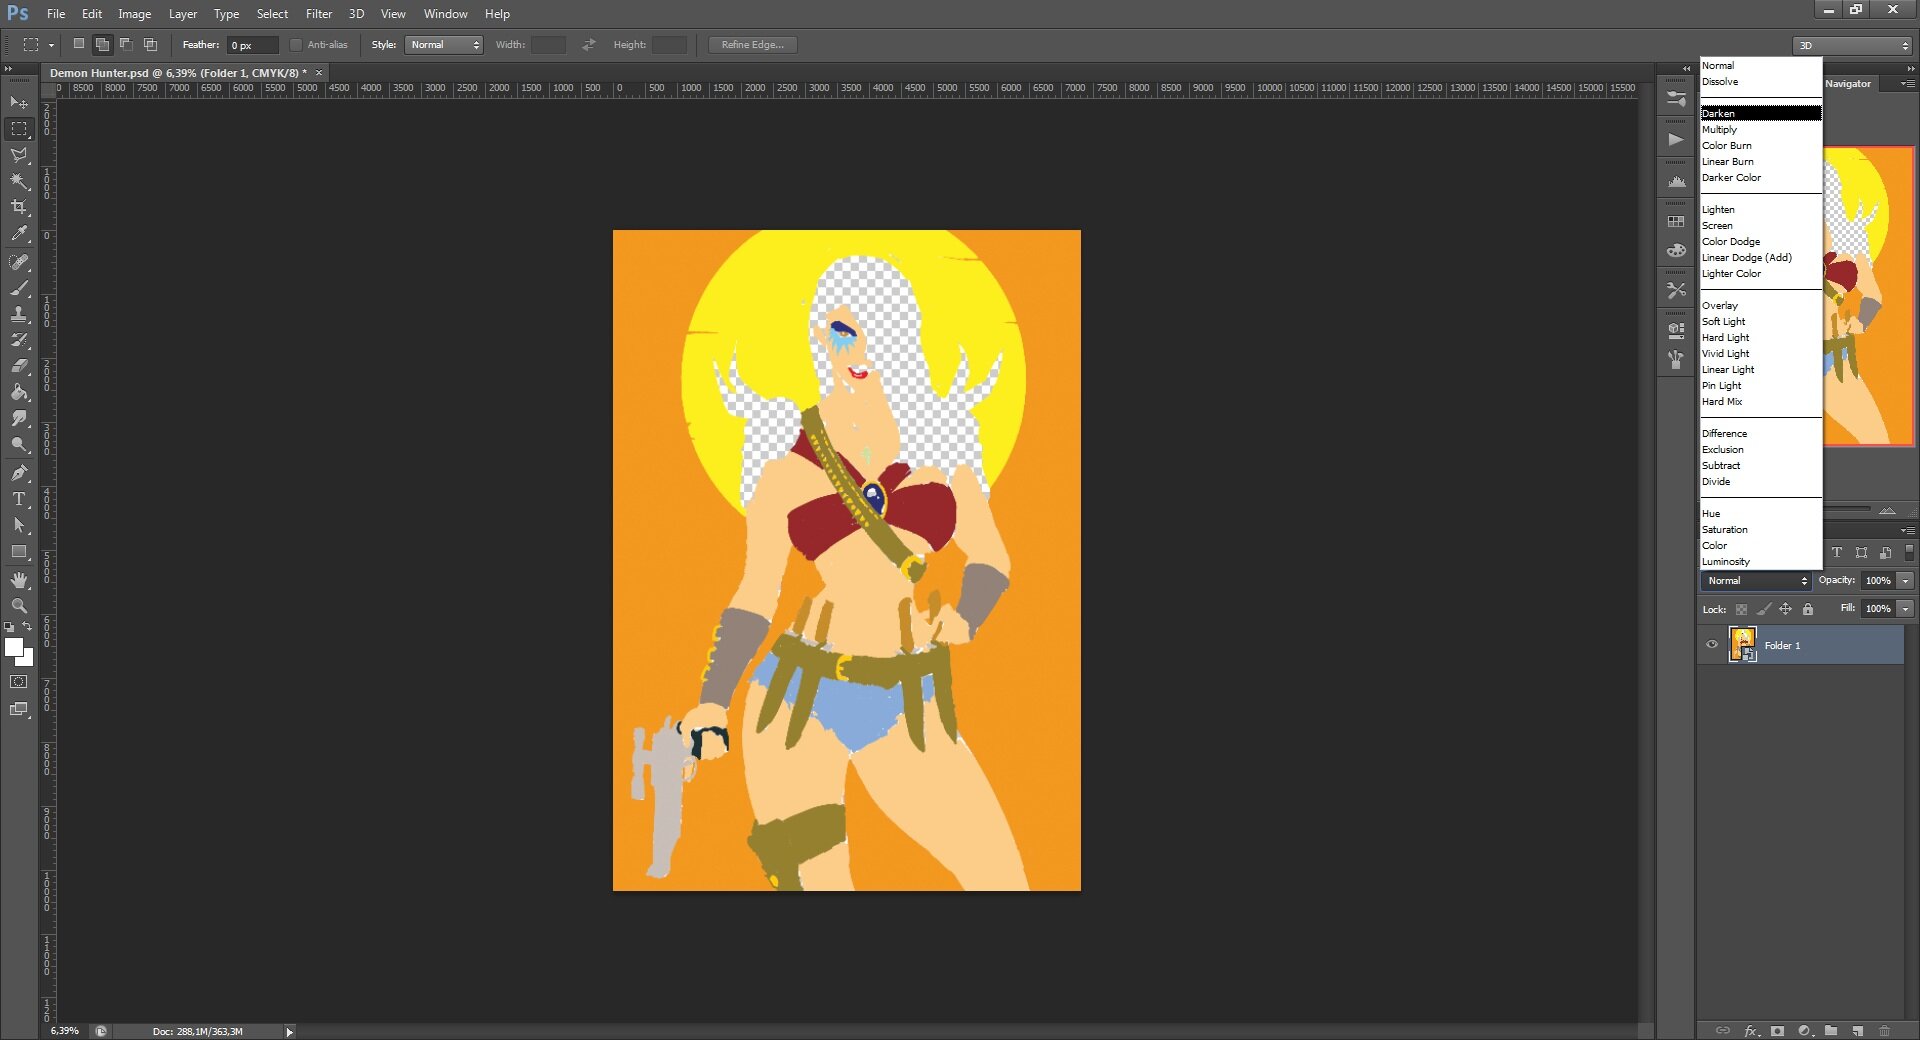
After that, make 4 duplicates of the layer. Each one for each color channel, you can change the names to C, M, Y and K if you like. Not really necessary.


How it should look
Next go to each layer and right click on them. Go to Blending options and in the channels part, uncheck channels and only leave the channel corresponding to each layer (C for the C layer, M for the M layer and so on)


Having done that, what you do next is select the C layer and go to Filter / Pixelate / Color Halftone.

I usually set the radius to 4 or 6. Depends on how big you want the dots to be. If you want them to be visible on print, set it to 10 or more.
Do the same with the M and Y layers. There is no need to do it on the K layer.
Time to add some texture. What you need is a paper and an “ink” texture. What I did is to scan an old comic page that had a lot of black and with the clone stamp tool filled the whole image with black. Then set it to black and white.
I did something similar with the paper texture, scanned a page that had the paper more visible and with the clone stamp tool fill it all until it got like a blank page.
Now if you don’t feel like doing that you can just download my textures here:
First, add the paper texture. You can do that by drag and drop the file on the image or open and copy the file.
Move the paper texture layer to the bottom. (rescale the layer to fit the image if needed)

It’s already looking good. Now add the ink texture to the file, the same way. This time move it to top and duplicate it.
If you dragged and drop the file, rasterize the layer by right clicking on it and selecting the Rasterize layer option (there is probably a shortcut for this but I don’t know)

Now it’s time to use those channels that you created. First select the top layer, set it to darken and go to the channels tab. Press ctrl and click on the first channel you created. This will bring back the selection you made at the beginning. When selected press Delete. This will now be your new line art layer.
After that select the layer below. Set it to Vivid Light. You will now see the drawing. Go to the channels tab and select the second channel by pressing ctrl and left click. When selected press Delete. This is so this layer only affects the color parts.

It should be looking like this. If you zoom in the colors look more like they are supposed to.
Now you could just save an call it a day. But this still needs some tweaking.
The imperfections is what creates the illusion. You can tweak the brightness of the line art layer and make it like they used less ink for it.
Like this:

Before

After. I up the brightness. You may notice that some of the color is visible on the lineart. This is because is set to darken and it’s an important effect. It was something that happened in old comic books, so when coloring, remember to be a little sloppy
Now the other defect we want to emulate is the channels not be perfectly aligned. What you do is select each of the C, M and Y layers and move them. I usually move the C a little to the right, the M a little to the left and the Y a little up. Sometimes I go beyond a rotate some of them. Depends on how you imperfect you want it to be.
Also another thing that I do is set the opacity of the C, M, Y and K layers to 80% or less, depending on the effect I want. Sometimes I use different opacity for each one. Just have fun experiment with that

I moved and rotated the C, M and Y layers. Opacity values are: K = 50%, Y = 45%, M = 80%, C = 60%
And that’s it. Now you have a classic comic book style drawing.
Here is the final result:

Close up

Well I hope this will be helpful. I know that there are easier methods like using truegrit plugins or permanent press, but this is a cheaper way to achieve this.
Thanks for reading.